Time for peek into the process of a painting! I made this one – Flower Girl – last year. {Interesting titling is not always my forté!} Some of the photos are annoyingly blurry but they still show the development of the painting. You can see how starting from a lovely messy and free base can be a fun and effective way of creating a looser painting, something I know lots of us struggle with. {I get emails about this all the time!}
First I made a lot of colourful mess – drips, active brush strokes in different directions, a bit of smudging and smearing.
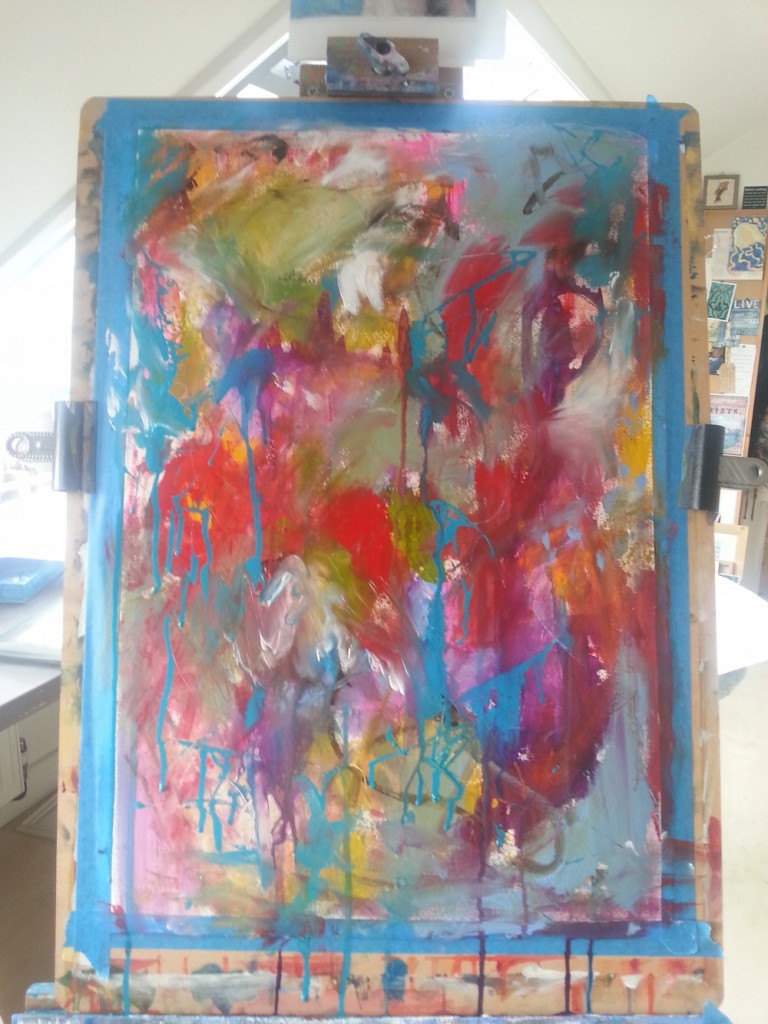
Then I started to map in the general shapes and outlines of the subject. I used a reference image I found on Pinterest for this one. And I discovered that drawing with the dropper that comes with acrylic ink bottles is both fun and makes great drippy lines. Great tip for keeping things loose, because you can’t control them.
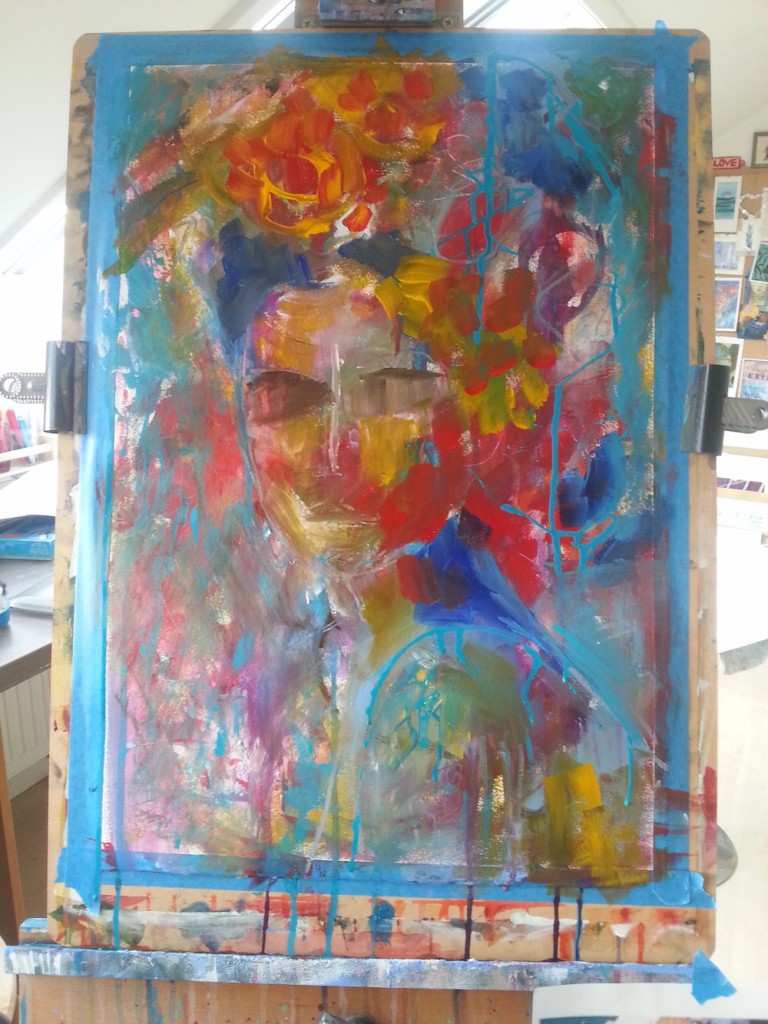
Starting to put in her face and layer in the flowers in her headdress.
At this point I started pushing back the background to allow her to stand out without being completely separate from it.
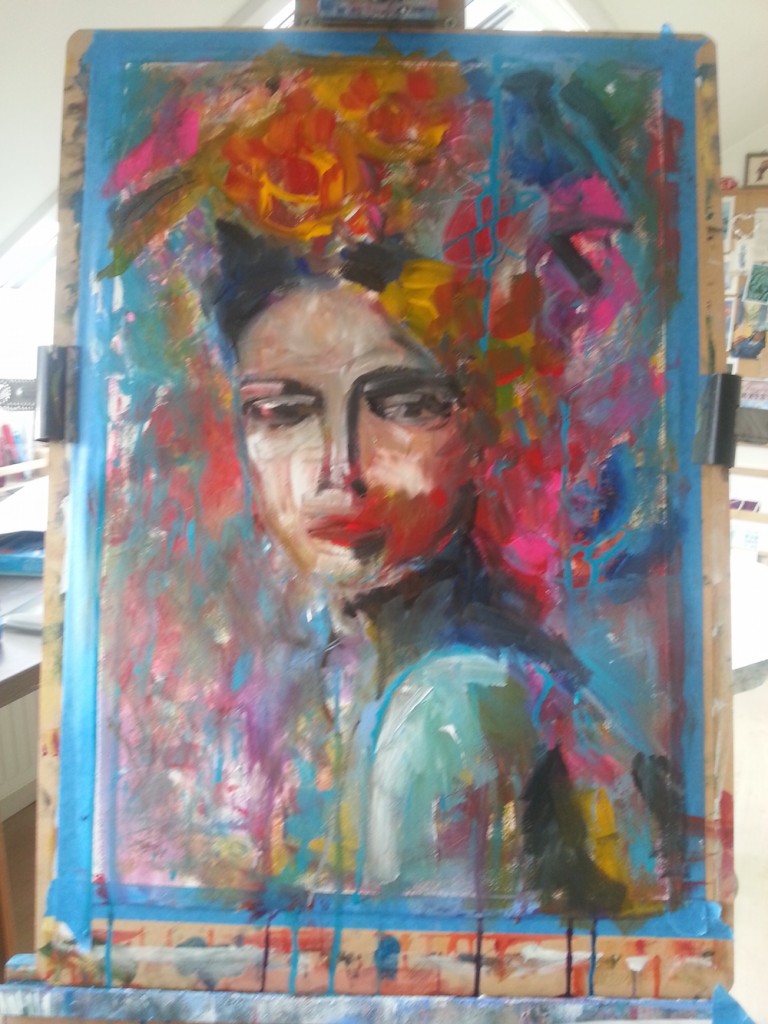
The great thing about painting this way is you can keep adding layers of colour until you like it. Anything you add, even if it doesn’t ‘make sense’ or is jarring colour wise, becomes part of the interestingness of the final painting. I find this particularly useful for faces and other things I’m less confident about painting.
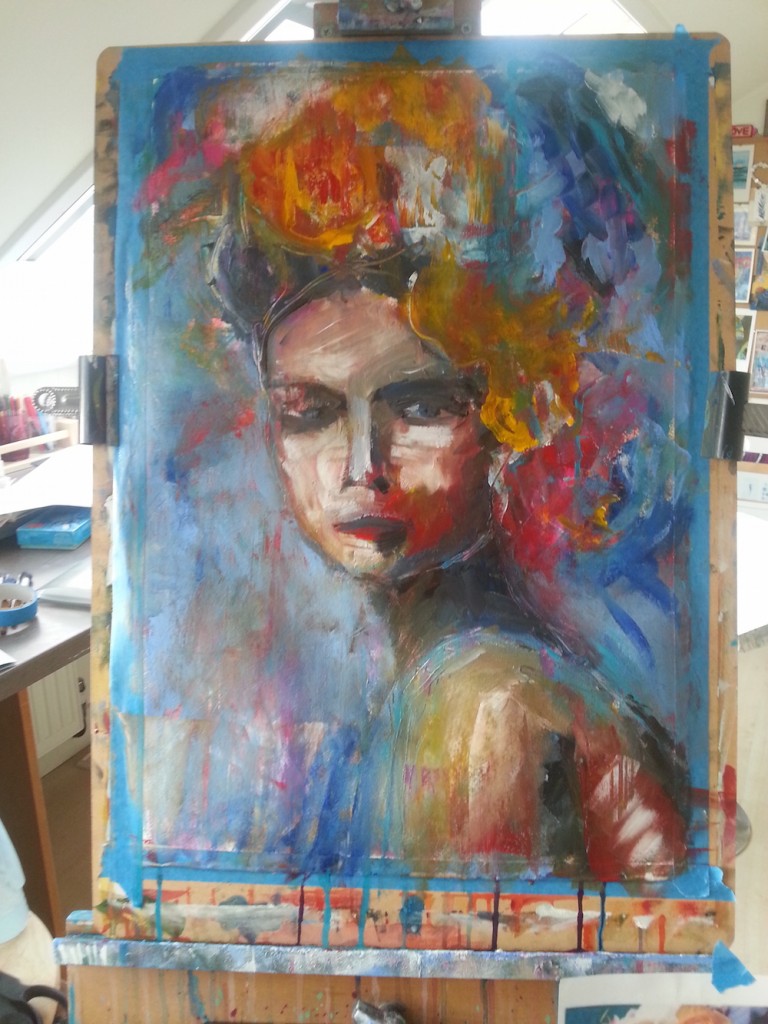
I love to scratch into the wet paint – the lines reveal the colours beneath and it just makes things more exciting to look at, I think.

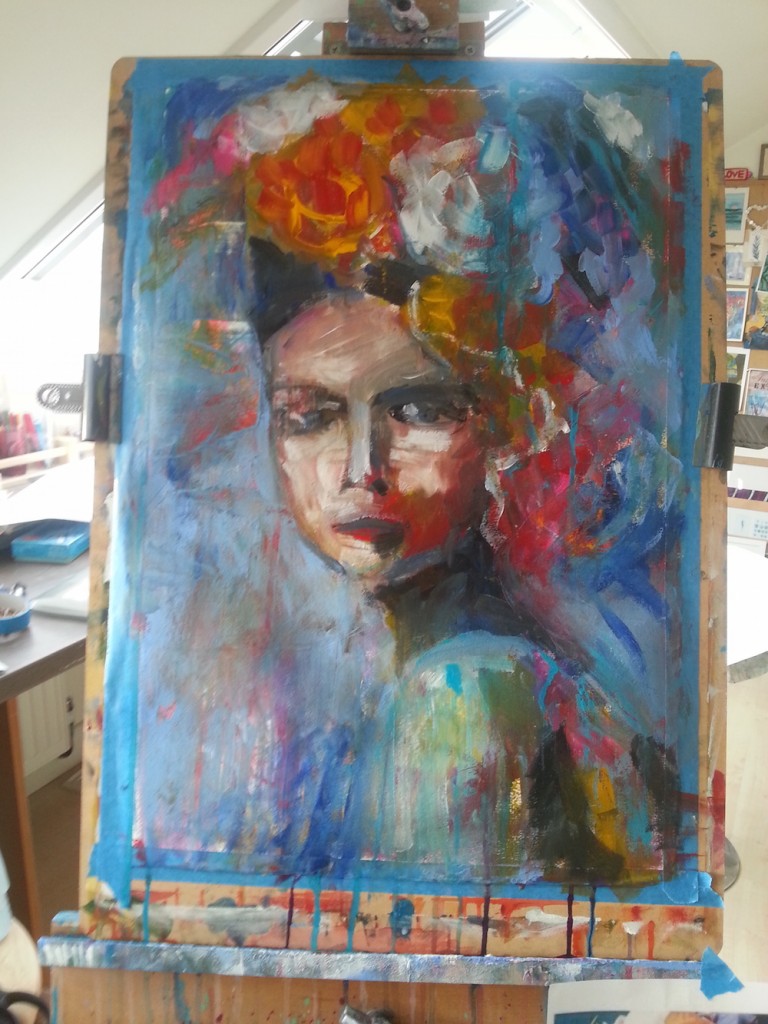
To finish her off I went back in with some oil pastels to highlight and add rough definition to a few areas. She came out pretty well in the end, in spite of {or perhaps because of} some struggles I had with her face and expression.
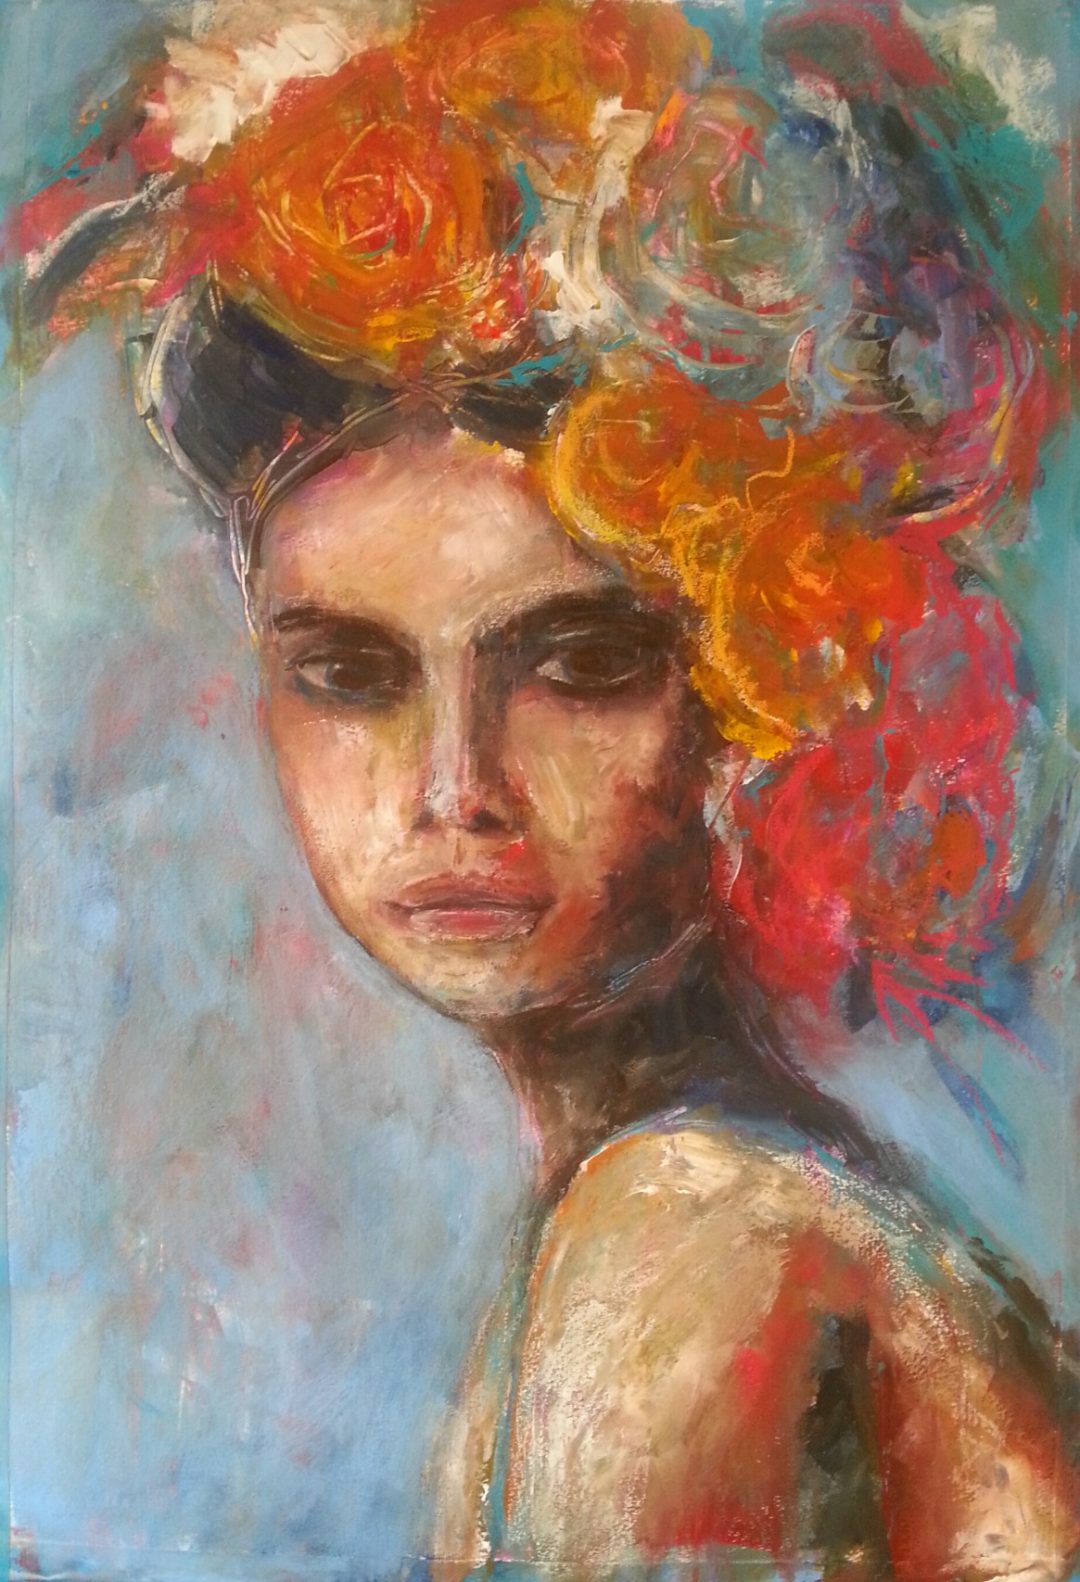
Flower Girl // mixed media on paper // Tara Leaver
Tara,
I have been getting your art sparks by email and so enjoy them. I want to sign up for your ecourse, but that may not be until March as I have too much going on. I just LOVE LOVE LOVE this flower girl. Beautiful.
Thanks for sharing it
Always happy to hear that Gerilyn! Thank you so much for the kind words.
Absolutely love it!! Love the symbolism of a messy base turned into something beautiful.
Thanks Rosemarye! I hadn’t thought of it that way but I love that too. No mud, no lotus!
She is beautiful. I do love these process shots – such changes from beginning to end.
Thank you Carmen! And yes, it’s fun to see the difference.
Hi Tara, I’ve been enjoying your book Creative Spark. I love your photos (and flower girl painting) thank you for showing your process…it helps me so much. I’m truly a beginner and I sometimes use canvases I buy second hand and just paint over; its so much fun to do that.
What paper did you use to paint Flower Girl? I realized I don’t always have to use canvas….and I was wondering what paper can hold up to the weight of layers of acrylic paint. Perhaps not paper…but something else? Thanks! Sue, in the central Texas Hill Country.
Oh I’m so pleased you have enjoyed it – thank you for buying the book Sue! I’ve painted over bought canvases too. I actually used watercolour paper for the Flower Girl painting – hot pressed is smoother than cold pressed and it’s nice and thick so can take the layers! Bristol board {which is really like thin card} is also good, and very very smooth, if that’s what you like. It’s preference really, so worth experimenting a bit.
Love this Tara this is what I aim to achieve!
LOVE your flower girl Tara, this is a beautiful piece, something to aspire too!
Thank you so much Debbi!
IMPRECIONANTE TECNICA DE PINTAR, SIN MODELO, LA IMAGEN SE GENERA POCO A POCO EN EL CEREBRO HASTA LLEGAR A LO SUBLIME , EN UNA OBRA DE ARTE.
FELICIDADES Y SALUDOS.
Muchas gracias. 🙂